
Salads
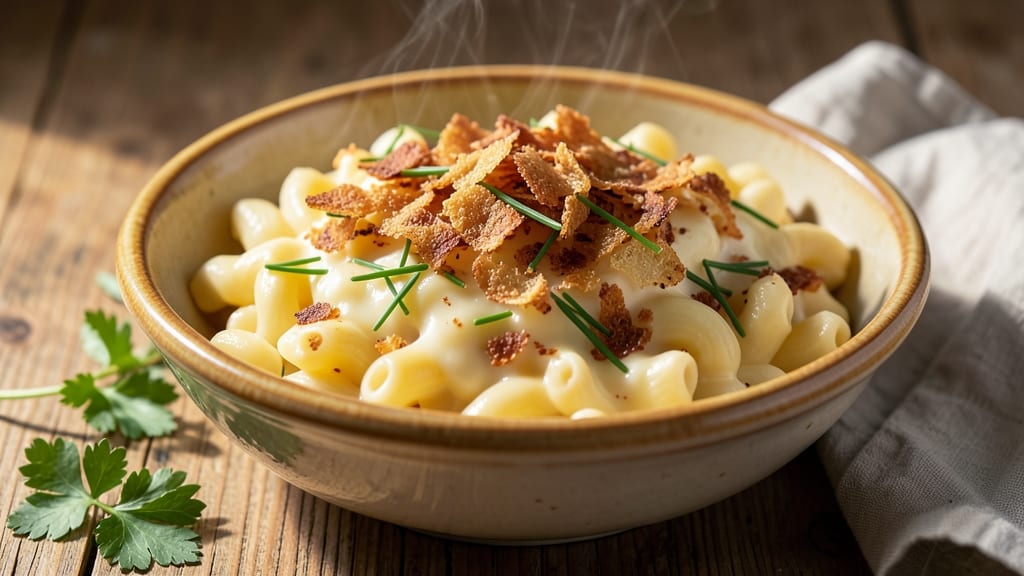
This Asiago macaroni and cheese delivers restaurant-quality comfort with its nutty, melty layers and crispy breadcrumb topping—no shortcuts, just rich, cheesy perfection. The secret lies in balancing sharp Asiago with creamy cheddar, creating a sauce that's both velvety and complex.
I developed this recipe after years of testing, ensuring every bite delivers that satisfying pull-apart texture and golden, toasted crust.
The process is straightforward but requires attention to detail: al dente pasta, a properly thickened cheese sauce, and a high-heat bake for that crispy finish. You'll start with stovetop cooking to build flavor, then transfer to the oven where the breadcrumb topping transforms into a golden, crunchy shield.
This isn't your childhood mac and cheese—it's a sophisticated dish that still feels like comfort food.
What sets this apart is the Asiago's nutty depth, which cuts through the richness while adding a sophisticated flavor profile. The crispy breadcrumb topping adds both texture contrast and visual appeal, making it perfect for serving at gatherings or as a weeknight treat.
Each forkful delivers that perfect balance of creamy, cheesy goodness with a satisfying bite from the crust.
The best part? This recipe scales beautifully—whether you're feeding a family of four or a crowd for a potluck. The instructions walk you through every step, from boiling the pasta to achieving that perfect crispy top. Let's get started on creating your new favorite mac and cheese.
Ingredients for asiago macaroni and cheese
The cheesy, nutty, crispy ingredients that transform simple pasta into restaurant-worthy comfort.
| Ingredient | Amount | Notes |
|---|---|---|
| Elbow Macaroni 🍝 | 12 oz | Al dente preferred, dry pasta |
| Sharp White Cheddar Cheese 🧀 | 2 cups | Shredded, block preferred |
| Asiago Cheese 🧀 | 1 cup | Shredded, finely grated |
| Heavy Cream 🥛 | ½ cup | Full-fat for richness |
| Whole Milk 🥛 | ½ cup | Warmed for smooth sauce |
| Unsalted Butter 🧈 | 4 tbsp | Cold for thickening |
| All-Purpose Flour 🌾 | 2 tbsp | For roux, sifted |
| Garlic Cloves 🧄 | 2 cloves | Minced for depth |
| Yellow Onion 🧅 | ½ whole | Diced, small amount |
| Dijon Mustard 🍯 | 1 tbsp | For tangy balance |
| Kosher Salt 🧂 | 1 ½ tsp | Adjust to taste |
| Ground Black Pepper 🌶️ | ½ tsp | Freshly cracked |
| Panko Breadcrumbs 🍞 | ½ cup | For crispy topping |
| Extra-Virgin Olive Oil 🫒 | 1 tbsp | For breadcrumb binding |
| Fresh Parsley 🌿 | ¼ cup | Chopped, for garnish |
The cheeses are the stars here—Asiago's sharp, nutty bite cuts through the creamy cheddar perfectly. Grab block cheeses and shred them yourself (pre-shredded has anti-caking agents that make the sauce grainy). For Asiago, Whole Foods or specialty cheese shops carry the good stuff, but the regular grocery store brand works in a pinch. The sharp cheddar? Kraft 2% Milk or Babybel are solid budget picks. Freshly grated always wins, but if you're short on time, the block form shreds easily with a box grater.
No Asiago? Parmesan at half the amount gives you some of that nutty depth, though it won't be quite the same. Heavy cream too rich? Swap for whole milk plus 1 tbsp extra butter. The Dijon mustard adds brightness—substitute with 1/2 tsp lemon juice if you're fresh out. For the breadcrumbs, Panko is non-negotiable—it stays crispy. No Panko? Toast regular breadcrumbs in a dry pan for 2-3 minutes until golden. The garlic and onion are just flavor boosters—skip the onion if you're in a rush, but don't skip the garlic.
This reheats beautifully—just cover with foil and nuke for 1-2 minutes. The crispy top? Broil for 2-3 minutes at the end if it loses its crunch. Store leftovers in the fridge for 4-5 days, but honestly, it's gone before then. Freezes for 3 months if you're planning ahead. I always double the breadcrumb topping—worth the extra minute for that perfect crunch. Garnish with parsley right before serving, or save it for the top when you're ready to eat.
Why You'll Love This Recipe
- No-Fuss Assembly: This comes together in one pot—no fancy steps, just boil pasta, melt cheese, stir. Honestly, I’ve made it while scrolling through my phone. The heavy cream and milk blend so smoothly, you won’t even notice the effort.
- Umami Bomb: That sharp cheddar and asiago combo? It’s like a flavor explosion in your mouth—nutty, tangy, and just salty enough to make you reach for seconds. The asiago adds this unexpected depth that turns ordinary mac and cheese into something special.
- Lunchbox Hero: Pack it cold for work or school—it reheats like a dream and still tastes rich and creamy. My kids actually eat their leftovers (a miracle), and it’s the perfect make-ahead meal when I’m swamped.
- Budget Stretch: Sharp chedddar and asiago are cheaper than you’d think, and this recipe stretches far enough to feed four for under $10. Plus, the leftovers taste just as good the next day—no sad, dry pasta here.
Step-by-step instructions for Asiago macaroni and cheese
This creamy, nutty masterpiece delivers perfect layers and a golden, crispy topping every time.
Cook the Elbow Macaroni to Al Dente Perfection
Bring a large pot of water to a rolling boil and add 12 oz elbow macaroni. Stir immediately to prevent sticking. Cook for 1 minute less than package instructions—you want al dente pasta that finishes cooking in the oven. Drain and set aside, reserving 1 cup of pasta water for later.
Real talk: Undercooked pasta here means a gummy final dish. Overcooked pasta means mushy mac and cheese. Test a piece by biting into it—it should offer slight resistance. Drain completely before proceeding, but keep that starchy pasta water nearby for your sauce.
Build the Creamy Asiago-Cheddar Sauce
In a large skillet, melt 4 tbsp unsalted butter over medium heat. Add 0.5 whole yellow onion and 2 cloves garlic cloves (minced), cooking until softened but not browned (3-4 minutes). Stir in 2 tbsp all-purpose flour and cook for 1 minute to remove the raw taste.
Slowly whisk in 0.5 cup heavy cream and 0.5 cup whole milk, letting the mixture thicken slightly. Reduce heat to low and stir in 2 cups sharp white cheddar cheese and 1 cup asiago cheese until fully melted and smooth. Remove from heat and stir in 1 tbsp dijon mustard, 1.5 tsp kosher salt, and 0.5 tsp ground black pepper.
Combine Pasta and Sauce
Add the cooked macaroni to the cheese sauce and toss gently until every strand is fully coated. If the sauce seems too thick, add reserved pasta water 1 tablespoon at a time until it reaches a creamy, pourable consistency. The mixture should be thick enough to coat the back of a spoon but still flow smoothly.
Here's the thing—this is where the magic happens. The residual heat from the pasta will help melt the cheese completely. If the sauce starts to separate, just give it a quick stir over low heat until smooth again. Don't worry if it looks too runny now; it'll thicken up beautifully in the oven.
Assemble and Bake to Golden Perfection
Transfer the macaroni and cheese to a greased 9x13-inch baking dish. In a small bowl, mix 0.5 cup panko breadcrumbs with 1 tbsp extra-virgin olive oil until evenly moistened. Sprinkle this mixture evenly over the top of the macaroni and cheese, pressing down gently to ensure good contact.
Bake at 375°F for 20-25 minutes until the top is golden brown and the edges are bubbling. The center should be hot but not boiling—it'll continue cooking slightly as it rests. You're aiming for that perfect contrast: creamy, melty layers with a crispy, crunchy topping.
Rest and Garnish for Maximum Impact
Remove from the oven and let the macaroni and cheese rest for 5-10 minutes before serving. This resting period allows the sauce to set slightly and the flavors to meld together. The dish will be hot but more manageable to serve.
Garnish with 0.25 cup chopped fresh parsley just before serving. The parsley adds a fresh contrast to the rich, nutty cheese and crispy topping. Cut into squares and serve immediately while the breadcrumbs are still crispy and the cheese is perfectly melty.
Pro Tips For Making Asiago Macaroni And Cheese
- MELT THE CHEESE LOW: Start your cheese sauce on medium-low heat—high heat turns it grainy before it even thickens. I learned this the hard way when my first batch looked like cheese-flavored grits instead of a smooth blanket for the pasta.
- GRATE THE ASIAGO FINE: Use a microplane or fine grater for the Asiago—big chunks won’t melt evenly and ruin the creamy texture. Sharp white cheddar holds up better in larger pieces, but Asiago’s nutty flavor needs to dissolve completely.
- SALT THE PASTA WATER: Add 1½ tablespoons of salt to the pasta water—yes, even if your pasta says "enriched." The sauce will soak up flavor, and unsalted pasta water tastes bland no matter how much cheese you add.
- STIR IN THE CREAM LAST: Wait until the milk-cheese mix is thickened and bubbling before adding the heavy cream—otherwise, it’ll separate or curdle. A splash of cold cream at the end also cools the sauce just enough for the perfect consistency.
Flavor customization for this dish
Classic Cheese Swaps
Want to play with flavors? Swap the Asiago for Pecorino Romano (½ cup) for a sharper, saltier kick that still keeps that nutty depth. Or try Gruyère (½ cup) for a slightly sweeter, earthier profile—it melts beautifully but adds a unique complexity.
For a smoky twist, mix in ½ cup smoked Gouda with the cheddar. Just remember, these changes will alter the sauce's texture slightly, so adjust your milk or cream by 1-2 tablespoons if needed. 🧀
Spicy Kick Variations
Add heat with ½ teaspoon of smoked paprika or ¼ teaspoon cayenne pepper to the cheese sauce for a subtle smoky warmth. For a more pronounced kick, stir in 1 tablespoon of hot honey or 1 teaspoon of sriracha at the end.
If you love chili, fold in ½ cup of cooked jalapeños (seeds removed) for a spicy-sweet contrast. Trust me, the crispy breadcrumb topping will balance the heat perfectly. 🌶️
Protein Add-Ins
Turn this into a heartier dish by mixing in ½ cup of cooked bacon bits (crispy, of course) or ½ cup of diced ham for a salty, savory boost. For a vegetarian option, try ½ cup of roasted mushrooms or ½ cup of crispy chickpeas for texture.
If you're feeling fancy, fold in ½ cup of cooked pulled chicken or crumbled feta for a Mediterranean twist. Just keep the protein to ½ cup max to avoid overpowering the creamy cheese sauce. 🍗
Herb and Veggie Boosts
Fresh herbs elevate this dish instantly. Toss in 2 tablespoons of chopped chives or 1 tablespoon of dried thyme with the cheese sauce for an earthy note.
For veggies, stir in ½ cup of finely diced roasted butternut squash or ½ cup of steamed broccoli florets—they add sweetness and color without overpowering. If you love garlic, add an extra 1 clove (minced) to the roux for a deeper flavor punch. 🌿
Crunchy Topping Upgrades
Skip the breadcrumbs for a different texture? Try ½ cup of crushed potato chips (like Kettle Brand for a smoky flavor) or ½ cup of crushed pretzels for a salty crunch. For a cheesy topping, sprinkle ¼ cup of grated Parmesan mixed with 1 tablespoon melted butter before baking.
If you're feeling adventurous, top with ½ cup of crushed pork rinds for a crispy, keto-friendly option. Just press them down gently so they stick! 🥔
Sweet and Tangy Twists
Balance the richness with a touch of sweetness or tang. Stir in 1 teaspoon of apple cider vinegar or ½ teaspoon of lemon zest to brighten the sauce. For sweetness, add 1 tablespoon of maple syrup or ½ teaspoon of vanilla extract to the cheese mixture.
A drizzle of honey or balsamic glaze over the top right before serving adds a gourmet touch. The contrast is surprising but delicious! 🍯
Nutrition facts
Frequently asked questions
Why does this recipe use both Asiago and cheddar?
The Asiago adds a nutty, slightly sweet depth that cuts through the creamy richness of the cheddar. Together, they create a perfectly balanced sauce with both sharpness and smoothness. The Asiago's unique flavor makes this dish stand out from classic mac and cheese.
Can I make this ahead of time?
Assemble the dish (without the breadcrumb topping) up to 24 hours ahead and refrigerate. When ready to bake, cover with the breadcrumbs and bake as directed. For the crispy topping, broil for 2-3 minutes at the end if needed.
What's the best way to reheat leftovers?
Cover with foil and reheat in the microwave for 1-2 minutes until warm. For oven reheating, bake at 350°F for 10-15 minutes covered, then broil for 1-2 minutes to restore crispiness. The breadcrumb topping may soften slightly but can be revived with a quick broil.
Can I substitute the elbow macaroni?
Yes, but stick to short pasta shapes like cavatappi, penne, or farfalle to maintain texture. Avoid long pasta that won't hold the sauce well. Cook times may vary slightly, so adjust accordingly for al dente results.
How do I fix a sauce that's too thick or too thin?
For a thick sauce, add reserved pasta water 1 tablespoon at a time until smooth. If too thin, remove from heat and stir in 1 tablespoon butter or 1 teaspoon flour to thicken. The sauce should coat the back of a spoon but still flow freely.