
Side Dishes
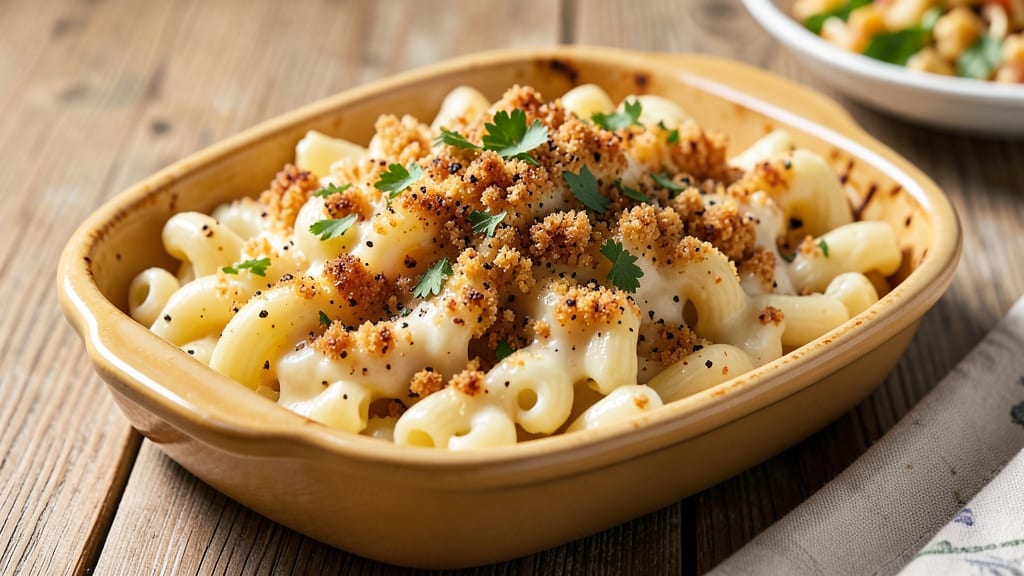
This baked creamy mac and cheese recipe with bread crumbs delivers the perfect balance of rich, velvety cheese sauce and crispy breadcrumb topping that everyone will crave. The secret lies in a precise technique that ensures creamy texture throughout while creating a golden, crunchy crust on top—no soggy bits here.
I've perfected this method after years of testing, and it consistently delivers restaurant-quality results at home. The process starts with al dente pasta cooked just right, then tossed in a luscious cheese sauce made with sharp cheddar, Gruyère, and cream cheese for depth.
What sets this recipe apart is the breadcrumb layer—lightly toasted before baking to create maximum crunch while staying crispy even after sitting. The oven temperature and baking time are critical for achieving that ideal texture.
By the time it emerges from the oven, you'll have a dish that's impossible to resist—creamy cheese stretching in golden streaks, topped with a perfectly crispy breadcrumb crust that adds satisfying texture with every bite.
This mac and cheese is hearty enough to serve as a main dish but works beautifully as a side for holidays or weeknight dinners. The best part? It reheats wonderfully, making it perfect for meal prep or leftovers.
Whether you're feeding a crowd or treating yourself to comfort food, this recipe delivers consistent, foolproof results every time. Let's get started with the step-by-step instructions that will have you mastering this classic dish in no time.
Ingredients for baked creamy mac and cheese recipe with bread crumbs
Six servings of pure comfort—creamy cheese sauce meets golden breadcrumb magic.
| Ingredient | Amount | Notes |
|---|---|---|
| Elbow Macaroni 🍝 | 1 ½ lb | Al dente when cooked |
| Sharp White Cheddar Cheese 🧀 | 2 cups | Shredded, block preferred |
| Gruyère Cheese 🧀 | 1 cup | Shredded, aged variety |
| Cream Cheese 🧈 | 8 oz | Full-fat for creaminess |
| Whole Milk 🥛 | 1 ½ cups | Full-fat for richness |
| Heavy Cream 🥛 | ½ cup | For ultra-smooth texture |
| Unsalted Butter 🧈 | ½ cup | Cold, cubed for sauce |
| Yellow Onion 🧅 | 1 whole | Finely diced for flavor |
| Garlic Cloves 🧄 | 4 cloves | Minced for aromatic depth |
| All-Purpose Flour 🌾 | 2 tbsp | For thickening sauce |
| Salt 🧂 | 1 ½ tsp | Kosher or sea salt |
| Ground Black Pepper 🌶️ | ½ tsp | Freshly cracked |
| Panko Breadcrumbs 🍞 | 1 cup | Lightly toasted for crunch |
| Parmesan Cheese 🧀 | ½ cup | Freshly grated, for topping |
The cheeses are where this dish shines. Sharp white cheddar gives that tangy kick, while Gruyère adds nutty depth—don't skimp on quality here. I grab Kraft sharp cheddar for consistency (it melts perfectly) and Whittard of Chelsea Gruyère when I'm feeling fancy. The cream cheese is non-negotiable—full-fat version makes the sauce truly velvety. For the breadcrumbs, Panko is your best bet—it stays crispy longer than regular breadcrumbs. Toast them lightly in a dry pan before using to boost flavor.
No sharp cheddar? Extra-sharp white cheddar works in a pinch, or swap half for Monterey Jack if you're avoiding dairy. Out of Gruyère? Parmigiano-Reggiano adds a similar umami punch. The milk and cream can be swapped for half-and-half**> for a lighter version, but trust me on the full-fat for that restaurant-quality texture. For the breadcrumbs, if you've got Italian seasoned breadcrumbs, use those—they add an extra layer of flavor. And if you're feeling adventurous, toasted pecans or walnuts mixed in add crunch with a gourmet twist.
This makes enough for leftovers—3-4 days in the fridge, 2 months frozen. I always bake it in a 9x13-inch dish for easy portioning. To reheat, cover with foil and warm at 350°F for 15 minutes. The breadcrumb topping stays crispy if you reheat it covered, then uncover for the last 2 minutes. For meal prep, assemble everything (including the breadcrumb topping) but don't bake—store covered in the fridge and bake straight from cold when ready.
Why You'll Love This Recipe
- One-Pan Magic: I swear by this dish when I’m too tired to wash extra pots—just toss the cooked pasta, cheese sauce, and bread crumbs into one baking dish. The Gruyère melts into that golden, bubbly crust without a single pan to scrub later.
- Cheddar-Gruyère Dream Team: That sharp white cheddar brings the tang, but it’s the Gruyère’s nutty depth that makes this ridiculously good. Add the cream cheese for richness, and suddenly you’ve got a sauce so smooth it’ll have your family asking for seconds before you even finish serving.
- Lunchbox Hero: Between us, this is my go-to for meal prep—portion it into containers, and it reheats like a dream. The bread crumb topping stays crispy even after a day in the fridge, so it’s basically a gourmet mac and cheese sandwich waiting to happen.
- Budget Buster: Honestly, this recipe costs me about $8 for a full casserole dish—way cheaper than takeout, and way more satisfying. The milk and bread crumbs stretch the cheeses just enough to feed four without breaking the bank, plus leftovers taste just as good the next day.
Step-by-step instructions for baked creamy mac and cheese with bread crumbs
This method delivers a restaurant-worthy mac and cheese with layers of crispy bread crumbs and gooey, melty cheese—every bite is pure comfort.
Cook the Elbow Macaroni to Al Dente Perfection
Bring a large pot of water to a rolling boil and add 1.5 pounds of elbow macaroni. Stir immediately to prevent sticking. Cook for 1 minute less than the package instructions—you want it al dente when drained. This ensures it finishes cooking in the oven without turning mushy.
While the pasta cooks, season the water generously with 1.5 teaspoons of salt (it should taste like the sea). Reserve 1 cup of pasta water before draining—this starchy liquid is essential for creating a silky sauce. Drain the pasta and return it to the pot, tossing gently with 2 tablespoons of all-purpose flour to help thicken the cheese sauce later.
Build the Ultimate Cheese Sauce
In a separate large bowl, combine 2 cups of sharp white cheddar cheese, 1 cup of gruyère cheese, 8 ounces of cream cheese, and 0.5 cup of unsalted butter (cold, cubed). Microwave for 30-45 seconds until the butter melts and the cheese begins to soften. Stir until smooth and creamy—this prevents lumps in your final sauce.
Gradually whisk in 1.5 cups of whole milk and 0.5 cup of heavy cream until fully incorporated. The sauce should be thick but pourable. If it’s too thick, add 1-2 tablespoons of reserved pasta water to loosen it. Season with 0.5 teaspoon of freshly cracked black pepper and set aside.
Sauté Aromatics for Depth of Flavor
In a skillet over medium heat, melt 0.5 cup of unsalted butter. Add 1 whole yellow onion, finely diced, and cook for 5-6 minutes until soft and translucent. Stir in 4 cloves of minced garlic and cook for 30 seconds until fragrant—don’t let it brown or it’ll turn bitter.
Remove the skillet from heat and stir the sautéed onions and garlic into the cheese sauce. Fold in the cooked elbow macaroni until every strand is fully coated in the rich, creamy mixture. Taste and adjust seasoning with additional salt if needed—this is where the magic happens.
Assemble the Triple-Layered Crunch
Preheat your oven to 375°F. Grease a 9x13-inch baking dish lightly with butter or oil. Spread half of the mac and cheese mixture evenly into the dish, creating a thin, even layer. Sprinkle half of the 1 cup of panko breadcrumbs and half of the 0.5 cup of freshly grated parmesan cheese over the top.
Repeat with the remaining mac and cheese, breadcrumbs, and parmesan. The layers ensure every bite has crispy crunch on top and creamy cheese underneath. For extra decadence, drizzle a little more melted butter over the top before baking.
Bake to Golden, Bubbly Perfection
Bake for 25-30 minutes until the top is deep golden brown and the edges are bubbling. The center should still be slightly jiggly—this ensures the cheese stays creamy, not rubbery. If the top browns too quickly, tent loosely with foil for the last 10 minutes of baking.
Let the mac and cheese rest for 5-10 minutes before serving. This allows the layers to set slightly, making it easier to slice and ensuring the breadcrumbs stay crispy. Serve immediately with a side of garlic bread or a simple green salad—every forkful is pure comfort in a dish.
Pro Tips For Making Baked Creamy Mac And Cheese Recipe With Bread Crumbs
- Preheat for 15 Minutes: Your oven isn’t ready until it’s actually hot—15 minutes at 375°F (190°C) makes all the difference for that crispy breadcrumb crust. I used to skip this, and my topping always ended up soggy or undercooked.
- Shred Cheese Fresh: Pre-shredded cheese has anti-caking agents that make your sauce grainy—skip it. Use a box grater or food processor for sharp cheddar and Gruyère, then toss with a splash of milk to melt it smoothly. Your sauce will thank you.
- Drain Macaroni Dry: Rinsing pasta removes starch, which is what helps thicken your cheese sauce. Drain it well, then shake the pot to break up clumps—this ensures a creamy, cohesive texture without lumps.
- Mix Breadcrumbs Wet: Toss your breadcrumbs with melted butter and a little milk before topping—this guarantees a golden, crispy crust instead of dry, crumbly bits. (Yes, even if it looks weird at first.)
Essential equipment for this dish
Baking Dish Essentials
Your 9x13-inch baking dish is the unsung hero of this recipe—it needs to be sturdy enough to handle the weight of all that melted cheese without warping. I recommend a heavy-gauge stainless steel or ceramic dish for even heat distribution.
Avoid glass if you're short on oven space—it can cause hot spots. A greased dish prevents sticking, but I like to use butter-flavored baking spray for extra insurance. 🧈
Mixing Bowls Matter
For the cheese sauce, use a large, deep mixing bowl—at least 4-quart capacity—to accommodate all the ingredients without spills. I prefer stainless steel because it conducts heat well when microwaving the cheese, but a glass bowl works too.
Avoid plastic—it can't handle the heat and may melt. A hand mixer or whisk is essential for smooth, lump-free sauce.
Pasta Tools
Invest in a fine-mesh colander with large holes to drain pasta efficiently without losing any noodles. I use a OXO Good Grips colander—it's sturdy and has a comfortable handle. For tossing the cooked pasta with flour, a wooden spoon works best to prevent sticking.
A measuring cup for the 1 cup pasta water is crucial—don't eyeball it, or your sauce will be too thick.
Bread Crumb Prep
A non-stick skillet (8-inch) is perfect for toasting 1 cup of panko breadcrumbs until golden. Heat it over medium-low to prevent burning—you want them just crispy enough to pop when you press them. I like to add a pinch of garlic powder to the breadcrumbs while toasting for extra flavor.
A fine-mesh sieve helps sift them evenly over the mac and cheese for that perfect crunchy layer.
Cheese Graters
Freshly grated parmesan cheese makes all the difference, so skip the pre-shredded stuff. A box grater works, but I prefer a mandoline-style grater like the Microplane for ultra-fine, even shreds. For the sharp white cheddar and Gruyère, use a large cheese block—it melts more smoothly than pre-shredded cheese.
A cheese slicer helps if you're working with a large wedge of Gruyère.
Temperature Control
An oven thermometer is a game-changer—your oven's temperature can vary by 25°F from what it displays. I use a Thermoworks Oven Thermometer to ensure my oven hits 375°F accurately. For the breadcrumb topping, a light-colored baking dish helps prevent over-browning.
If your oven runs hot, tent the dish with foil for the last 10 minutes to keep the crunch intact. 🌡️
Nutrition facts
Frequently asked questions
Can I use regular breadcrumbs instead of panko?
Regular breadcrumbs will work, but they won't give you that same satisfying crunch. Panko stays crispier longer because its larger flakes toast more evenly. If you're in a pinch, lightly toast your regular breadcrumbs in a dry pan for 2-3 minutes to improve texture. For extra flavor, add a pinch of garlic powder or smoked paprika while toasting.
Why did my mac and cheese turn out greasy?
Greasy mac and cheese usually means too much butter or cream in the sauce. The recipe balances 0.5 cup butter, 1.5 cups milk, and 0.5 cup heavy cream for perfect creaminess. If your sauce seems too rich, reduce the butter by 2 tablespoons next time. Also, make sure your pasta is fully coated in sauce—uneven distribution can create greasy spots.
Can I make this ahead of time?
Assemble everything (including the breadcrumb topping) but don't bake. Store covered in the fridge for up to 2 days or freeze for 2 months. To bake from cold, add 10-15 extra minutes to the baking time. For fridge storage, bake straight from cold at 375°F. The breadcrumbs will still stay crispy if you reheat covered, then uncover for the last 2 minutes.
What's the best way to reheat leftovers?
Cover your baked mac and cheese with foil and reheat at 350°F for 15 minutes. For extra crispiness, place it under the broiler for the last 1-2 minutes (watch closely to avoid burning). Microwave reheating works too: Cover with a damp paper towel and heat in 30-second intervals until warm, stirring between each interval. The breadcrumbs stay crunchier with oven reheating.
Can I make this gluten-free?
Yes! Swap the elbow macaroni for gluten-free pasta (like brown rice or chickpea pasta) and use gluten-free breadcrumbs or crushed gluten-free crackers. For the sauce, ensure your flour is gluten-free (like rice flour) if you need to thicken it. The cheese sauce will still be creamy, though the texture might be slightly different. Test with a small batch first to adjust thickness.