
Main Courses
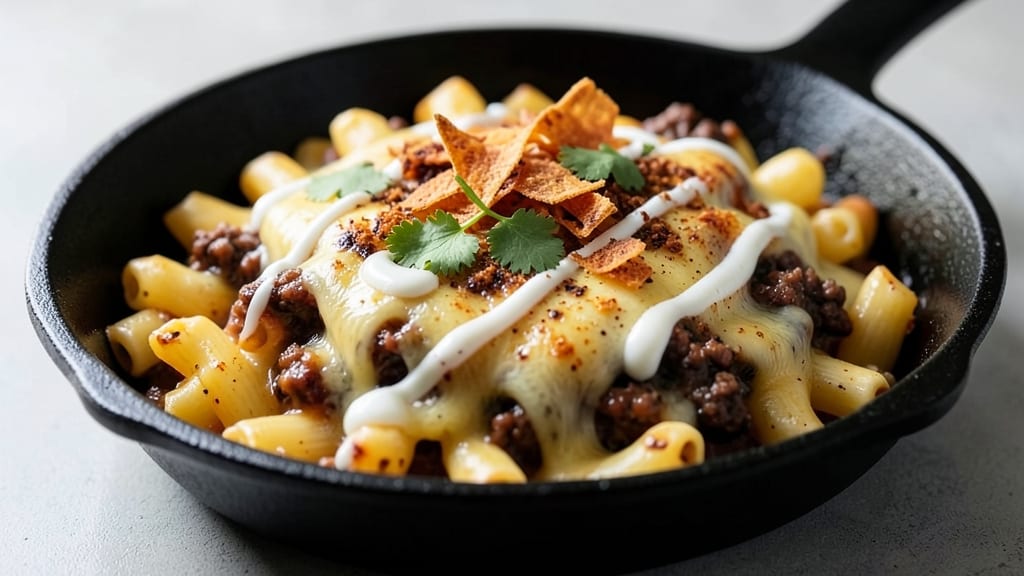
This baked taco mac and cheese recipe delivers the ultimate comfort food mashup—creamy macaroni meets bold taco flavors with a crispy tortilla chip topping that turns every bite into a flavor explosion.
The secret lies in blending cheddar and Monterey Jack with taco seasoning, creating those signature spicy cheese rivers that make this dish impossible to resist. I've perfected this recipe through years of testing, ensuring the mac stays perfectly tender while the tortilla topping achieves that ideal crunch.
What sets this dish apart is the balance of textures and flavors: the velvety cheese sauce, the slight kick from taco seasoning, and the satisfying crunch of the tortilla topping.
You'll start with a classic mac and cheese base, then transform it into something entirely new by adding ground beef, jalapeños, and a blend of cheeses that melts into rich, flavorful rivers.
The tortilla chips on top aren't just for show—they create that coveted crispy contrast that keeps everyone reaching for seconds.
The result is a dish that's hearty enough to satisfy a crowd but simple enough for a weeknight dinner. The combination of cheesy goodness and bold taco flavors makes it a crowd-pleaser, while the crispy topping adds a restaurant-quality touch.
This isn't just mac and cheese—it's a complete meal that brings the flavors of your favorite taco night to the dinner table in one delicious bite.
Ready in about 45 minutes, this recipe is perfect for game day, family dinners, or whenever you're craving something indulgent yet easy to make. The best part? It reheats beautifully, so you can enjoy leftovers just as much as the first serving. Let's get cooking!
Ingredients for baked taco mac and cheese
Bold taco flavors meet cheesy comfort—here's everything you need for that perfect crispy-topped dish.
| Ingredient | Amount | Notes |
|---|---|---|
| Elbow Macaroni 🍝 | 1 ½ lbs | Uncooked, medium or small shape |
| Ground Beef 🥩 | 1 ½ lbs | 80/20 fat ratio preferred |
| Sharp Cheddar Cheese 🧀 | 2 cups | Shredded, block preferred |
| Monterey Jack Cheese 🧀 | 1 ½ cups | Shredded, block preferred |
| Taco Seasoning 🌶️ | 2 tbsp | Homemade or store-bought |
| Heavy Cream 🥛 | 1 cup | Full-fat for richness |
| Whole Milk 🥛 | ½ cup | For creaminess |
| Jalapeño Peppers 🌶️ | 2 whole | Fresh, seeded and diced |
| Tortilla Chips 🍟 | 3 cups | Crushed, corn or flour |
| Butter 🧈 | ½ cup | Unsalted, melted |
| All-Purpose Flour 🌾 | 2 tbsp | For thickening sauce |
| Salt 🧂 | 1 ½ tsp | Adjust to taste |
| Black Pepper 🌶️ | ½ tsp | Freshly ground |
The cheese is where the magic happens. Sharp cheddar and Monterey Jack create those signature spicy rivers, but grab block cheese and shred it yourself—pre-shredded gets gummy. For the beef, 80/20 fat ratio keeps it juicy, and I always brown it first in a skillet before mixing it into the mac. Taco seasoning? Homemade is ideal, but Old El Paso or McCormick work in a pinch. The tortilla chips? Crush them by hand—that extra texture is what makes the topping so addictive. Pro tip: look for thick chips like Tostitos Scoops—they hold up better to baking.
No sharp cheddar? Pepper jack or Colby Jack add heat without sacrificing melt. Short on Monterey Jack? Extra cheddar plus a splash of milk keeps the sauce rich. The jalapeños can be swapped for pickled jalapeños for tanginess or green chiles for a milder kick. Heavy cream too expensive? Half-and-half works too. For the tortilla chips, flour tortilla chips get extra crispy, but corn chips add that authentic taco vibe. And if you're feeling fancy, add a handful of chopped cilantro to the topping before baking—trust me on this one.
This dish tastes even better the next day—honestly, the flavors meld into something incredible after reheating. Store leftovers in the fridge for 4-5 days, covered tightly so the chips don't lose their crunch. Freezes beautifully for 3 months—just bake from frozen with an extra 10 minutes. I always make a double batch because it disappears fast. For serving, a sprinkle of extra crushed chips on top right before eating keeps that crispy contrast. And if anyone asks, the secret is in the butter-to-flour ratio—don't skip the 2 tbsp flour when thickening that sauce.
Why You'll Love This Recipe
- One-Pan Magic: I swear by this recipe because it’s literally one bowl, one pan, and done. The macaroni cooks right in the cheese sauce while the beef browns—no boiling pasta separately, no extra pots to wash. Honestly, the only cleanup is licking the bowl.
- Cheesy Spice Bomb: That combo of sharp cheddar, Monterey Jack, and taco seasoning? It’s like mac and cheese had a flavor makeover. The beef adds savory depth, and the seasoning gives it that warm, smoky kick—rich enough to satisfy but not so heavy you’ll need a nap afterward.
- Game for Any Night: Between us, this is my go-to for game days, lazy Sundays, or when I’m too tired to think. It’s hearty enough for a crowd but still hits the spot for just me and a bad movie. (Yes, even on a Tuesday night.)
- Budget-Friendly Leftovers: Ground beef and elbow macaroni stretch this dish into a full week of lunches. I’ll be real: the second day’s even better because the flavors meld overnight. Plus, it’s cheap enough to feed the whole family without breaking the bank—or my willpower.
Step-by-step instructions for baked taco mac and cheese
This cheesy, spicy masterpiece delivers crispy tortilla topping and gooey melted rivers—every bite is a flavor explosion.
Cook the Elbow Macaroni Al Dente
Bring a large pot of water to a rolling boil and add 1.5 lbs elbow macaroni. Season generously with 1.5 tsp salt—it should taste like the ocean. Cook for 11-12 minutes until the pasta is al dente (a toothpick should slide in with slight resistance). Drain immediately and return the pasta to the pot.
While the pasta cooks, I like to keep a 1-cup measure of pasta water handy. This starchy liquid will become our secret weapon for creating a silky cheese sauce later. Don't rinse the pasta—those surface starches are what help the cheese cling beautifully.
Brown the Ground Beef Perfectly
In a large skillet over medium-high heat, add 1.5 lbs ground beef broken into small pieces. Let it cook undisturbed for 3-4 minutes until the meat loses its raw color and begins to brown. This step is crucial—it develops deep, meaty flavors that will infuse your entire dish.
Once browned, drain most of the fat (leave about 1 tablespoon) and add the 2 tbsp taco seasoning. Stir well and cook for another 1-2 minutes until fragrant. Let this mixture cool slightly before combining with the pasta—this prevents the cheese from separating when we mix everything together.
Create the Ultimate Cheese Sauce
In the same skillet (with residual beef fat), melt the 0.5 cup butter over medium heat. Whisk in the 2 tbsp all-purpose flour and cook for 1-2 minutes until it forms a smooth roux. Slowly pour in the 1 cup heavy cream and 0.5 cup whole milk, whisking constantly to prevent lumps.
Reduce heat to low and add the 2 cups sharp cheddar cheese and 1.5 cups monterey jack cheese, stirring until completely melted and smooth. Remove from heat and stir in the diced jalapeño peppers—this is where the heat comes in! Return the cooked macaroni and beef mixture to the skillet and combine thoroughly.
Assemble and Bake to Crispy Perfection
Transfer the macaroni mixture to a 9x13-inch baking dish and spread it evenly. Press 3 cups crushed tortilla chips firmly on top, making sure they cover the entire surface. This is what creates that addictive crispy texture you're craving.
Bake at 375°F for 20-25 minutes until the top is deep golden brown and bubbly. The cheese should be melted to perfection with those beautiful rivers flowing through the chips. If it browns too quickly, tent loosely with foil for the last 5 minutes to prevent burning.
Rest and Serve with Fiery Flavor
Remove from oven and let rest for 5-10 minutes—this allows the cheese to set slightly and makes serving easier. The tortilla chips will crisp up even more as they cool. Garnish with extra freshly ground black pepper and serve immediately while the cheese is still molten.
Each bite should deliver that perfect balance of creamy, cheesy goodness with a satisfying crunch from the tortilla chips. The jalapeños add just the right amount of heat to cut through the richness. This dish is so good, you'll want to make it your new weekly staple!
Pro Tips For Making Baked Taco Mac And Cheese
- CRANK THE OVEN HIGHER: Bake this at 400°F (not 375°F) for the first 15 minutes—yes, even if the cheese looks undercooked. That extra heat melts the cheddar and Monterey Jack faster, and you’ll get that perfect golden crust without burning the top. I learned this the hard way when my first batch came out sad and pale.
- DRAIN MACARONI WELL: No one likes soggy pasta in their taco mac. Drain the elbow mac and run it under cold water for 10 seconds to stop the cooking, then shake it dry in the colander. Wet pasta means watery mac, and no one wants that—especially when you’re going through the effort of baking it.
- BROWN THE BEEF FIRST: Skip the pre-cooked shortcut and brown the ground beef in a dry skillet before adding taco seasoning. That extra step makes the flavor pop—no one wants bland taco seasoning floating in a sea of cheese. Just don’t overcrowd the pan, or you’ll steam the meat instead of browning it.
- LAYER CHEESE LIKE A PRO: Start with a thin layer of shredded cheese at the bottom of your baking dish, then add the mac and beef mixture, and finish with another thick layer on top. This ensures every bite has that melty, cheesy goodness—no dry spots here. And if you’re worried about clumping, microwave the cheese for 30 seconds first.
Make-ahead tips for leftovers
Prep Ahead Strategy
I always recommend prepping the macaroni and cheese base the day before baking. Cook the pasta and beef mixture as directed, then cool it completely before refrigerating in an airtight container.
The flavors meld beautifully overnight, and you'll save 30 minutes on baking day. Just add the cheese sauce and tortilla chips fresh before baking—this keeps the topping perfectly crispy. 💫
Freezer-Friendly Assembly
For maximum convenience, assemble the dish completely (including chips) and freeze it unbaked. Wrap tightly with plastic wrap followed by foil to prevent freezer burn. When ready to bake, thaw in the fridge overnight, then bake at 375°F for 30-35 minutes (extra time needed from frozen).
The texture stays perfect—just as crispy and cheesy as fresh! ❄️
Reheating Leftovers
Leftovers reheat best in the oven to maintain that crispy topping. Cover with foil and bake at 350°F for 15-20 minutes, then uncover and broil for 1-2 minutes to restore the chip crunch.
For stovetop, add 2 tbsp milk to prevent drying, covering with a damp paper towel. Microwave reheating works too—just stir and cover with a damp towel for 90 seconds at 50% power. 🔥
Portioning for Parties
When making for crowds, divide the baked mac and cheese into 8x8-inch baking dishes before the final bake. This lets you serve smaller portions while keeping the crispy topping intact. For serving, use a pizza cutter to create clean slices—it's much easier than a knife!
I also recommend pre-crushing extra chips in a resealable bag with a rolling pin for quick topping refreshments. 🍽️
Make-Ahead Topping Hack
Pre-crush your tortilla chips and store them in a resealable bag at room temperature for up to 1 week. This saves time on baking day and keeps them fresh. For extra crunch, sprinkle a tiny bit of cornstarch on the chips before crushing—it helps maintain crispiness during storage.
I always keep a bag of crushed chips ready in my pantry for last-minute taco nights! 🌶️
Nutrition facts
Frequently asked questions
Can I make this taco mac and cheese without ground beef?
Swap the beef for 1.5 cups of seasoned black beans (drained and rinsed) or 1 cup of diced chicken for a lighter option. For extra protein, add 1 cup of cooked corn kernels—it pairs perfectly with the taco flavors. Just reduce the milk slightly to maintain the right cheese-to-liquid ratio.
Why did my tortilla chips get soggy instead of crispy?
This usually happens when the chips absorb too much moisture from the cheese. To fix it, press the chips firmly on top before baking, and bake at 375°F for 20-25 minutes until golden. For extra crunch, sprinkle a thin layer of crushed cornflakes between the chips and cheese before baking. Also, avoid opening the oven door early—let it bake undisturbed!
Can I use a different type of pasta for this recipe?
Elbow macaroni is ideal because of its shape, but you can use penne, cavatappi, or rotini for a similar texture. Avoid long pasta like spaghetti or linguine—they won't hold the cheese as well. If using a different shape, cook it 1 minute less than package instructions to prevent overcooking during baking.
How can I make this dish spicier?
Add 1-2 extra diced jalapeños or swap them for 1-2 tbsp of hot sauce mixed into the cheese sauce. For smoky heat, stir in 1 tsp of smoked paprika with the taco seasoning. If you love kick, sprinkle ½ tsp of cayenne pepper on top before baking—just be cautious with kids or sensitive eaters!
Is this dish kid-friendly, or will the spice scare them away?
Most kids love this recipe! Reduce the jalapeños to 1 whole pepper (seeded and finely diced) or omit them entirely. The taco seasoning provides mild flavor without heat. Serve the spicy bits on the side so kids can add it if they want. The crispy tortilla topping is always a hit!