
Breakfast & Brunch
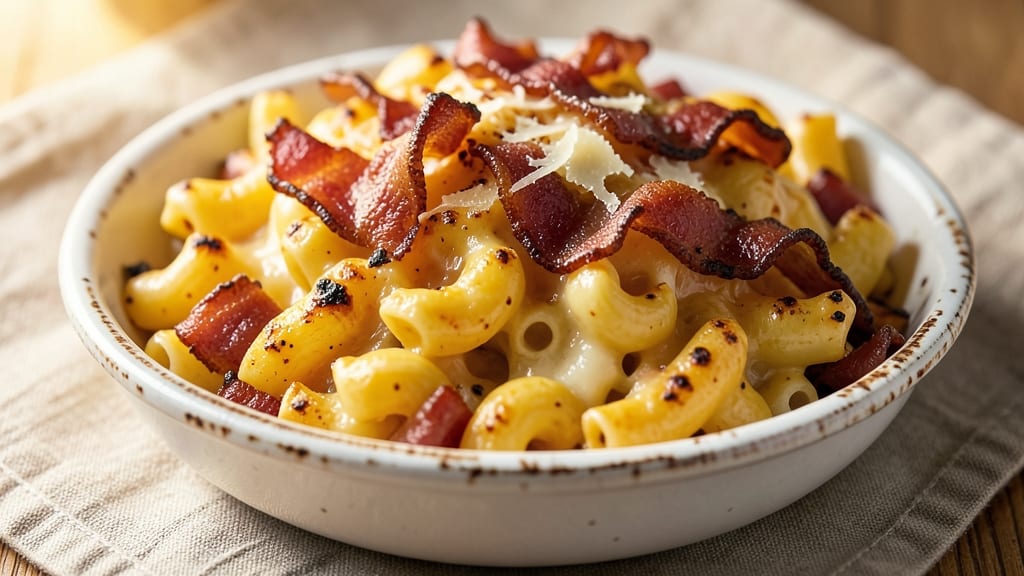
This bacon mac and cheese bites recipe delivers the perfect balance of crispy, golden edges and gooey, smoky cheese pull-apart magic—ideal for brunch, game day, or a comforting snack. 🔥 The secret lies in combining creamy mac and cheese with crispy bacon, then baking until the edges are perfectly crunchy while the centers stay melty.
I’ve perfected this recipe to ensure every bite is a satisfying mix of textures and flavors, making it a crowd-pleaser that disappears faster than you can say "cheese pull."
The process is straightforward but delivers restaurant-quality results. You’ll start by cooking the mac and cheese to a thick, creamy consistency, then mix in crispy bacon for that signature smoky flavor.
After shaping the mixture into bite-sized balls and coating them in a mix of breadcrumbs and seasonings, they go into the oven at 375°F (190°C) for about 15–20 minutes, until golden and bubbly.
The key is achieving that crispy exterior without drying out the cheese inside—a challenge I’ve tested and refined to perfection.
What you’ll end up with are crispy, pull-apart bites that are impossible to resist. The exterior is golden and crunchy, while the inside is rich, cheesy, and packed with smoky bacon flavor. These bites are perfect for serving at parties, meal prepping, or enjoying as a quick snack.
The best part? They’re easy to customize—add jalapeños for heat, green onions for freshness, or even a sprinkle of paprika for extra depth.
Once you try these, you’ll never go back to regular mac and cheese again. The combination of textures and flavors makes them a standout dish that’s sure to impress. Let’s get started—your taste buds will thank you!
Ingredients for bacon mac and cheese bites
Crispy bites with gooey cheese pull-apart magic—just eight ingredients transform into a crowd-pleaser.
| Ingredient | Amount | Notes |
|---|---|---|
| Elbow Macaroni 🍝 | 12 oz | Uncooked, medium or small size |
| Heavy Cream 🥛 | ½ cup | Full-fat for creaminess |
| Whole Milk 🥛 | ½ cup | Warmed for smooth sauce |
| Sharp Cheddar Cheese 🧀 | 2 cups | Shredded, aged for flavor |
| Monterey Jack Cheese 🧀 | 1 cup | Shredded, mild and creamy |
| Butter 🧈 | ½ cup | Unsalted, cubed for melting |
| Bacon 🥓 | 8 oz | Cooked crispy, chopped |
| All-Purpose Flour 🌾 | ¼ cup | For thickening sauce |
| Panko Breadcrumbs 🍞 | 1 ½ cups | For crispy coating |
| Parmesan Cheese 🧀 | ¼ cup | Freshly grated for flavor |
| Garlic Powder 🧄 | 1 tsp | For extra depth |
| Smoked Paprika 🌶️ | ½ tsp | For smoky flavor |
| Salt 🧂 | 1 tsp | Kosher or sea salt |
| Black Pepper 🌶️ | ½ tsp | Freshly ground preferred |
The cheese is non-negotiable here. Grab sharp cheddar and Monterey Jack from the deli counter—the pre-shredded stuff gets clumpy and lacks flavor. Trader Joe's and Whole Foods have the best selection, but any grocery store's cheese aisle works. For the macaroni, small or medium elbow works best—it holds its shape better than large. The bacon? Cook it crispy first—no one likes soggy bacon in their bites. I always grab thick-cut bacon because it crisps up perfectly and adds that smoky punch everyone loves.
No sharp cheddar? Pepper Jack at half the amount gives you heat and creaminess. Out of Monterey Jack? Gruyère melts beautifully—just use a little less since it's stronger. Running low on panko? Regular breadcrumbs toasted in the oven work in a pinch. The flour is just for thickening, so any all-purpose brand is fine. For the bacon, if you can't find thick-cut, regular bacon cooked extra crispy still delivers that smoky flavor. The key to crispy bites is the coating—don't skip the Parmesan in the breadcrumb mix!
These bites reheat beautifully—just pop them in the oven at 350°F (175°C) for 5-7 minutes until golden. Store leftovers in an airtight container for up to 3 days in the fridge. Freeze extras on a tray first, then transfer to a bag for up to 3 months. I always make a double batch—one for dinner, one for snacks. The flavor actually improves after baking, so they're perfect for meal prep. Serve warm with a side of marinara for dipping!
Why You'll Love This Recipe
- One-Bowl Magic: I swear by this recipe when I’m too tired to measure five ingredients—just dump the pasta, pour in the cream and milk, then fold in that crispy bacon and melty cheese. The elbow macaroni soaks up the sauce perfectly, so no weird dry bits here.
- Crispy-Creamy Obsession: That sharp cheddar and Monterey Jack combo? Chef’s kiss. The outside gets a golden, slightly crispy edge from the oven, while the inside stays rich and creamy—like biting into a hug. Honestly, I’ve made this three times in a row just to prove it.
- Party-Proof Snack: Between us, these bites disappear at gatherings—no one can resist them. They’re easy to assemble ahead (just reheat before serving) and work for game day, potlucks, or even a lazy Sunday spread. Plus, they’re the kind of food that makes you look like a hero.
- Budget-Friendly Leftovers: I’ve saved $20+ by making these instead of takeout. The heavy cream and milk stretch the cheese further than a full casserole, and the leftovers reheat beautifully—whether I’m microwaving them for lunch or popping them back in the oven for dinner.
Step-by-step instructions for bacon mac and cheese bites
Here's how to make these irresistible crispy bites with gooey, smoky cheese perfection.
🔥 Step 1: Cook the Bacon and Prep the Macaroni
Start by cooking the 8 oz bacon in a large skillet over medium heat until crispy. I like to cut it into small pieces as it cooks so it's ready to fold into the mac and cheese later. Drain on paper towels to remove excess grease, but leave about 2 tablespoons of bacon fat in the pan—it adds incredible flavor to the sauce.
While the bacon cooks, boil the 12 oz elbow macaroni in salted water according to package directions until al dente (about 8-10 minutes). Drain and set aside, reserving ½ cup of pasta water. This starchy water will help create a silky sauce later. Don't rinse the pasta—those surface starches are essential for the sauce to cling.
🍳 Step 2: Build the Ultimate Cheesy Sauce
In the same skillet with the bacon fat, melt the ½ cup butter over medium heat. Whisk in the ½ cup all-purpose flour to create a roux, cooking for 1-2 minutes until it turns a light golden color. This step is crucial—it thickens the sauce and adds depth of flavor.
Slowly pour in the ½ cup heavy cream and ½ cup whole milk, whisking constantly to prevent lumps from forming. Let the mixture simmer for 3-4 minutes until it thickens slightly. Then, reduce the heat to low and gradually add the 2 cups sharp cheddar cheese and 1 cup monterey jack cheese, stirring until completely melted and smooth. If the sauce gets too thick, add 1-2 tablespoons of reserved pasta water to loosen it. Season with 1 tsp salt, ½ tsp black pepper, 1 tsp garlic powder, and ½ tsp smoked paprika—this is where the magic happens!
👨🍳 Step 3: Combine Macaroni and Cheese Mixture
Add the cooked macaroni to the skillet with the cheese sauce and stir gently to coat every noodle in that creamy, cheesy goodness. Fold in the crispy bacon pieces and ¼ cup freshly grated parmesan cheese for an extra layer of flavor. The mixture should be thick but still pourable—if it's too dry, add more pasta water 1 tablespoon at a time until it reaches your desired consistency. Let the mixture cool slightly for 5 minutes so it's easier to handle.
Here's the thing—don't skip the cooling step. Warm mac and cheese is easier to shape, but it'll fall apart when you try to coat it in the breadcrumbs. Patience now means crispy perfection later.
🥘 Step 4: Create the Crispy Coating
Preheat your oven to 375°F and line a baking sheet with parchment paper. In a shallow bowl, mix together the 1.5 cups panko breadcrumbs with the remaining ¼ cup parmesan cheese and a pinch of salt and black pepper. This gives your bites that extra crunch and flavor boost.
Working quickly, use a spoon or small ice cream scoop to portion the mac and cheese mixture into 1-inch balls (about 1 tablespoon each). Roll each ball in the panko mixture, pressing gently to ensure an even coating. Place the coated bites on the prepared baking sheet, spacing them about 1 inch apart—they'll expand as they bake.
🔥 Step 5: Bake to Golden, Gooey Perfection
Bake the mac and cheese bites for 18-20 minutes until they're deep golden brown and the edges are crispy. The cheese inside should be bubbling and pulling apart slightly—this is what makes them irresistible! If they're browning too quickly, tent them loosely with foil to prevent burning while they finish cooking inside.
Let the bites rest for 5 minutes after baking—this helps them set and makes them easier to serve. They'll be hot and gooey, with crispy exteriors that give way to the creamy, cheesy center. Serve immediately while they're still warm and enjoy the pull-apart magic! These bites are perfect for game day, appetizers, or a fun twist on classic mac and cheese.
Pro Tips For Making Bacon Mac And Cheese Bites
- COOK PASTA AL DENTE THEN DRAIN: I used to overcook the elbow macaroni thinking it’d soften more in the cheese sauce—wrong. Stop at al dente, drain it, and give it a quick rinse under cold water. The starch stays on the pasta (helping the sauce cling), and the texture holds up better when you shape the bites.
- SHRED CHEESE FINE AND DRY: Skip the pre-shredded cheese in the bag—it’s coated with anti-caking agents that make the sauce grainy. Instead, grate sharp cheddar and Monterey Jack yourself on the largest holes of a box grater, then pat the shreds dry with a paper towel. Less moisture means smoother, creamier bites.
- CRISP THE BACON FIRST: Cook the bacon until it’s fully crisp before mixing it into the mac and cheese. Cold, chewy bacon ruins the bite’s texture, and you’ll end up with soggy edges. Save the bacon fat too—it’s liquid gold for the sauce (just drain it well).
- CHILL THE MIX BEFORE SHAPING: I learned this the hard way—rolling hot mac and cheese into bites makes them fall apart. Let the mixture sit in the fridge for 10-15 minutes until it’s cool enough to handle. The cheese firms up just enough to hold its shape, and the bites stay intact when baking. (Yes, even if you’re impatient like me.)
Creative variations of this recipe
Spicy Kick
Add ½ tsp cayenne pepper or 1 tbsp hot sauce to the cheese mixture for a fiery twist. I love using Penzeys Louisiana Hot Sauce for that smoky heat—just mix it in with the garlic powder and smoked paprika.
For a milder heat, try 1 tsp chipotle powder in the breadcrumb coating. 🌶️
Breakfast Twist
Swap the sharp cheddar for ½ cup cream cheese and add 2 tbsp maple syrup to the sauce for a sweet-savory breakfast version. Top the bites with crumbled sausage and a sprinkle of everything bagel seasoning before baking. Serve with a side of scrambled eggs for a brunch crowd-pleaser!
Vegetarian Option
Skip the bacon and use ½ cup cooked tempeh or crumbled vegan bacon for a plant-based version. Boost umami with 1 tbsp nutritional yeast in the cheese sauce and 1 tsp liquid smoke in the breadcrumb mix. The texture stays crispy, and the flavor stays rich—just as satisfying!
Extra Crunch
For maximum crunch, mix ¼ cup crushed potato chips (like Kettle Brand or Ruffles) into the breadcrumb coating. I also like adding 1 tbsp crushed cornflakes for an extra layer of texture. These bites become irresistibly crunchy while keeping the gooey center intact.
Gourmet Upgrade
Elevate these bites with truffle oil—drizzle ½ tsp over the baked bites before serving. For a fancy touch, add 1 tbsp finely chopped chives or truffle-infused salt to the breadcrumb mix. Trust me, your guests will think you spent hours in the kitchen! 💫
Air Fryer Shortcut
For a quicker version, shape the bites and air-fry at 375°F for 8-10 minutes, shaking the basket halfway. The air fryer creates a crispy exterior without needing to watch the oven as closely. Just be careful—they brown faster than in the oven! Perfect for weeknight snacks.
Nutrition facts
Frequently asked questions
Can I make these bites ahead of time?
Shape the bites and refrigerate them uncooked for up to 24 hours before baking. For best results, bake from cold at 375°F (190°C) for 22-25 minutes, adding 2-3 extra minutes. You can also freeze the uncooked bites on a tray, then transfer to a bag for up to 3 months. Bake frozen bites at 375°F (190°C) for 25-30 minutes until golden.
Why did my bites turn out greasy instead of crispy?
Greasy bites usually mean too much moisture in the coating or undercooked breadcrumbs. First, ensure your panko is fresh—old breadcrumbs lose their crispiness. Second, pat the mac and cheese mixture dry before shaping, and don't overfill the bites. Finally, bake on the middle rack for even heat circulation. If they still seem greasy, try toasting the breadcrumbs in the oven at 350°F (175°C) for 5 minutes before using them.
What's the best way to reheat leftovers?
Reheat in a 350°F (175°C) oven for 5-7 minutes until golden and bubbly—this preserves that crispy exterior. For a quick fix, use an air fryer at 350°F (175°C) for 3-4 minutes, shaking halfway. Microwaving works in a pinch (30 seconds), but the texture suffers. Always reheat until steaming hot to kill any bacteria.
Can I use a different type of pasta? Elbow macaroni is ideal for its shape and texture, but you can try small shells or cavatappi for better bite retention. Avoid large shapes like penne—they're harder to coat evenly. If using shells, fill them with extra cheese for maximum cheesy pull-apart action! Just
How do I make these bites spicier?
For extra heat, add ½ tsp cayenne or 1 tbsp hot sauce to the cheese mixture. For a smoky kick, mix 1 tsp chipotle powder into the breadcrumb coating. Another trick: fold in 1 tbsp diced jalapeños with the bacon. Start with mild heat and adjust to taste—you can always add more spice, but you can't take it out!