
Appetizers
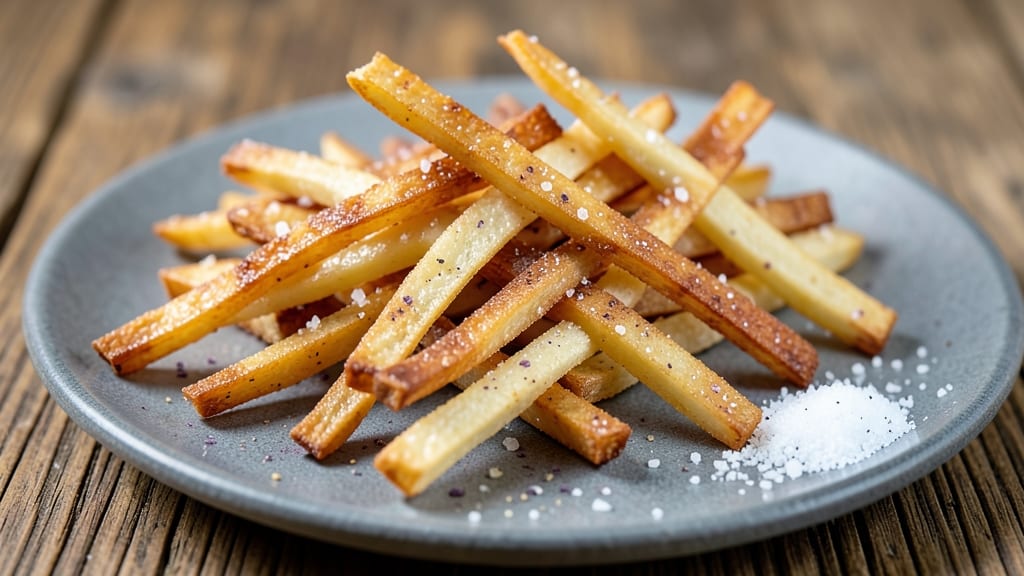
This Asiago cheese straws recipe delivers the perfect balance of crispy edges and gooey, nutty cheese centers that disappear in seconds. 🔥 The secret lies in a precise ratio of flour, butter, and freshly grated Asiago—no shortcuts here.
I’ve perfected this over years of baking, ensuring every batch turns out golden and shatteringly crisp with rivers of melted cheese inside.
The dough comes together in just 10 minutes with simple pantry staples, but the magic happens during baking at 425°F for 10-12 minutes. The high heat ensures that signature crispness while keeping the cheese perfectly molten.
Optional seasonings like garlic powder, parsley, or a pinch of chili flakes can elevate these from classic to gourmet in seconds.
What you’ll end up with is a tray of addictive, buttery bites that are ideal for parties, game day, or snacking straight from the oven. The contrast of crispy dough and creamy cheese makes them impossible to resist—each bite is a perfect harmony of textures and flavors.
Serve warm with marinara or ranch for dipping, or enjoy them as-is while still piping hot.
These straws also reheat beautifully, making them perfect for meal prep or leftovers. Store in an airtight container for up to 3 days, or freeze for longer storage—just bake fresh from frozen for that same irresistible crunch. Ready to master the art of the cheese straw?
Ingredients for asiago cheese straws
Pantry staples plus one key cheese—these 9 ingredients create irresistible crispy bites.
| Ingredient | Amount | Notes |
|---|---|---|
| All-Purpose Flour 🌾 | 2 ½ cups | Sifted for light texture |
| Unsalted Butter 🧈 | ½ cup | Cold, cubed for flaky layers |
| Asiago Cheese 🧀 | 1 ½ cups | Freshly grated, block preferred |
| Granulated Sugar 🍚 | 1 tbsp | For subtle sweetness |
| Garlic Powder 🧄 | ½ tsp | For aromatic depth (optional) |
| Salt 🧂 | ½ tsp | Diamond Crystal preferred |
| Black Pepper 🌶️ | ¼ tsp | Freshly ground for warmth |
| Chili Flakes 🔥 | ¼ tsp | For subtle heat (optional) |
| Ice Water 💧 | ¼ cup | For dough elasticity |
The Asiago cheese is non-negotiable here. Grab a wedge from the deli counter—pre-shredded gets clumpy and lacks that nutty depth. Whole Foods or Trader Joe's have the best selection, but any grocery store should carry it. If you can't find Asiago, Parmigiano-Reggiano is a decent substitute, though it won't have that same signature tang. The butter needs to be cold—take it out of the fridge 15 minutes before mixing, but don't let it soften. For the flour, King Arthur or Gold Medal brands work best—they're finely milled and give that perfect crispy texture.
No garlic powder? Fresh minced garlic at half the amount works too, but it'll add moisture. Short on chili flakes? Red pepper flakes or cayenne at a pinch brings the heat. The sugar is optional but balances the saltiness beautifully—skip it if you prefer savory. For the dough, don't overwork it. Just mix until it comes together, then chill for 20 minutes before rolling. That rest time is crucial for preventing shrinkage. If your dough feels too sticky, add 1 tbsp more flour—but don't go overboard or they'll turn dense.
These reheat like a dream—just pop them in a 375°F oven for 3-4 minutes until crispy again. Store leftovers in an airtight container between layers of parchment paper to keep them crisp for 3 days. For freezing, bake fresh from frozen at 425°F for 14-16 minutes—they'll still be golden and crispy. I always make a double batch because they disappear faster than you can say 'gooey cheese center.' Keep extras in the freezer for spontaneous snack attacks.
Why You'll Love This Recipe
- No-Fuss Dough: I swear, this dough comes together faster than I can say "preheat oven." Just mix the cold butter into the flour—no creaming, no fuss—then fold in that sharp Asiago. Five minutes of hands-on time, and you’re done.
- Umami Crunch: That first bite? The garlic powder gives it a savory punch, while the Asiago melts into a gooey, salty-sweet center. Honestly, it’s the kind of flavor that makes you reach for the recipe again before the batch is gone.
- Party in a Pan: These are my go-to for game day, book club, or just because. Bake a big sheet, and suddenly you’ve got a snack that’s fancy enough for guests but easy enough to make when you’re not feeling Pinterest-perfect.
- Budget Snack Gold: A bag of flour and a wedge of Asiago stretch into a mountain of straws—way cheaper than store-bought. Plus, they keep for days in an airtight container, so you’re never scrambling for last-minute nibbles.
Step-by-step instructions for Asiago cheese straws
Here's how to create golden, shatteringly crisp cheese straws with gooey melted Asiago rivers.
👨🍳 Step 1: Cut and Chill the Butter
Place the 0.5 cup unsalted butter between two sheets of parchment paper and use a rolling pin to flatten it into an even rectangle. Cut it into ¼-inch thick slices using a sharp chef's knife. This creates perfect butter "ribbons" for maximum crispiness.
Transfer the butter slices to a plate and refrigerate for 20-30 minutes until firm but still pliable. Cold butter is crucial—it prevents the dough from becoming too soft and ensures those beautiful flaky layers. If your kitchen is warm, pop them in the freezer for 10 minutes instead.
👨🍳 Step 2: Mix Dry Ingredients and Create the Dough
In a large bowl, whisk together the 2.5 cups all-purpose flour, 1 tbsp granulated sugar, 0.5 tsp garlic powder, 0.5 tsp salt, 0.25 tsp black pepper, and 0.25 tsp chili flakes. Sift the mixture once to aerate the flour—this creates lighter, crispier straws. Set aside.
Add the 1.5 cups freshly grated Asiago cheese to the dry ingredients and mix with your fingers until the cheese is evenly distributed and the mixture resembles coarse crumbs. The cheese should be cool to the touch—if it's warm, chill it for 10 minutes first to prevent melting during mixing.
👨🍳 Step 3: Combine and Roll the Dough
Place the cold butter slices on top of the cheese mixture. Using a pastry cutter or your fingers, work the butter into the dry ingredients until you have a crumbly dough that comes together when pressed. Add 1-2 tablespoons of ice water if the mixture is too dry—just enough to hold together when pinched.
Once the dough forms a shaggy mass, turn it out onto a lightly floured surface. Gently press and fold it 3-4 times until smooth. Wrap the dough in plastic wrap and refrigerate for 30 minutes to firm up. This resting time makes rolling much easier and prevents the dough from sticking.
🔥 Step 4: Roll and Cut the Straws
Preheat your oven to 375°F and line two baking sheets with parchment paper. On a lightly floured surface, roll the chilled dough into a ¼-inch thick rectangle about 12x18 inches. Use a sharp bench scraper to cut the dough into ¼-inch wide strips—keep them straight for even cooking.
Gently lift the strips and arrange them on the prepared baking sheets, leaving 1 inch between each for spreading. Bake for 12-15 minutes until the edges are deep golden brown and the cheese begins to melt. Watch closely after 10 minutes—they crisp up quickly!
🔥 Step 5: Bake to Crispy Perfection
Remove the cheese straws from the oven and immediately transfer them to a wire rack to cool completely. Here's the secret: they'll continue crisping as they cool, becoming even more shatteringly crisp. If any straws lose their shape during baking, simply reshape them gently with a fork before cooling.
For maximum crispiness, store the cooled straws in an airtight container with a piece of bread to absorb moisture. Serve warm for the best texture—these straws are best enjoyed fresh from the oven when the cheese is still gooey inside those crispy layers.
Pro Tips For Making Asiago Cheese Straws
- CHILL THE DOUGH: Cold butter makes the difference here—literally. Take your butter out of the fridge just long enough to soften slightly (it should dent when pressed), then refrigerate the dough for 30 minutes before rolling. I learned this the hard way when my first batch spread like melted ice cream; the dough needs structure to hold its shape during baking.
- GRATE THE CHEESE FINE: Skip the food processor—your fingers will thank you later. Use a box grater (the smallest holes) and grate the Asiago yourself. Pre-shredded cheese has anti-caking agents that make these straws dense and gummy. Do this step fresh, right before mixing, or the cheese will lose its sharpness and melt unevenly.
- ROLL THIN, CUT SMALL: Consistency is key—aim for ⅛-inch thickness and cut strips about ¼-inch wide. Thicker dough bakes unevenly (chewy centers, burnt edges), and wider strips puff up like little cheese blisters instead of crisp straws. Use a ruler to measure the dough before cutting; freehand leads to disappointment.
- BAKE IN BATCHES: One tray at a time, or the oven gets too crowded. I used to load both racks and ended up with soggy bottoms from steam. Space straws 1 inch apart—they’ll spread slightly—and rotate the tray halfway through. If your oven runs hot, lower the temp by 25°F and watch closely after 10 minutes.
Best sauces and condiments for this recipe
Classic Marinara Dip
Warm ½ cup marinara sauce (I love Rao's or Barilla) in a small saucepan until steaming, then stir in 1 tbsp olive oil and ½ tsp dried oregano. The acidity cuts through the richness of the cheese straws beautifully.
Serve in a shallow bowl so guests can dip—just a few seconds in the sauce makes them irresistible. 🍅
Creamy Ranch Twist
Mix ½ cup ranch dressing (Kraft or homemade) with 1 tbsp sour cream and ½ tsp garlic powder for a cooling contrast. The tangy creaminess balances the nutty Asiago perfectly. For extra flair, sprinkle with chopped chives right before serving. This combo is a game-changer for parties.
Spicy Honey Glaze
Combine 2 tbsp honey, 1 tsp sriracha, and ½ tsp lime juice in a small bowl, then warm gently. Drizzle over the warm cheese straws for a sweet-spicy contrast that makes every bite addictive. The honey caramelizes slightly on the warm straws, creating a sticky, flavorful coating. 🌶️
Garlic Aioli
Blend ½ cup mayonnaise, 1 roasted garlic clove, 1 tsp lemon juice, and ½ tsp salt until smooth. The creamy garlic flavor complements the straws' crispy texture while adding depth.
Serve in a small bowl with a side of toothpicks for easy dipping. This sauce elevates the straws to gourmet status.
Warm Olive Oil
Simply heat ¼ cup extra-virgin olive oil with 1 tsp flaky sea salt and ½ tsp red pepper flakes until fragrant. Pour into a shallow dish and let guests dip the straws for a simple yet sophisticated touch.
The olive oil enhances the nutty Asiago flavor while adding a luxurious finish. Perfect for those who prefer minimal fuss.
Blue Cheese Dip
Crumble ½ cup blue cheese (like Gorgonzola) into ¼ cup sour cream with 1 tbsp chopped walnuts and ½ tsp honey**. The bold, tangy flavor pairs surprisingly well with the mild Asiago, creating a complex bite.
Serve chilled for a refreshing contrast to the warm straws. This dip turns a simple snack into a flavor adventure. 🧀
Nutrition facts
Frequently asked questions
Can I substitute Asiago cheese with something else?
Yes! If you can't find Asiago, try Parmigiano-Reggiano for a similar nutty flavor or Pecorino Romano for extra sharpness. For a milder taste, Gruyère works well too. Just remember that pre-shredded cheeses won't melt as beautifully—always grate your own for the best results.
Why did my cheese straws turn out dense instead of crispy?
Overworking the dough or skipping the 30-minute chill are the most common culprits. Make sure your butter is cold, don't add too much ice water, and roll the dough just ¼-inch thick. Bake at 425°F (not lower) for 10-12 minutes—high heat is key for that signature crispiness!
How can I make these straws spicier?
Add ½ teaspoon cayenne pepper or 1 teaspoon smoked paprika to the dry ingredients for heat. For extra kick, sprinkle with ½ teaspoon chili powder after baking. If you love spicy dips, try our spicy honey glaze pairing—it's a crowd-pleaser!
Can I make these ahead of time for a party?
Bake them 1 day ahead and store in an airtight container with a slice of bread to keep them crisp. For parties, reheat at 375°F for 3-4 minutes until golden. Freeze extras for up to 1 month—bake straight from frozen at 425°F for 14-16 minutes.
What's the secret to getting those perfect melted cheese rivers?
The key is freshly grated Asiago and baking at high heat. Roll the dough ¼-inch thick, cut straight strips, and bake until edges are golden but centers are still slightly soft. The residual heat will melt the cheese beautifully as they cool—just don't overbake!