
Main Courses
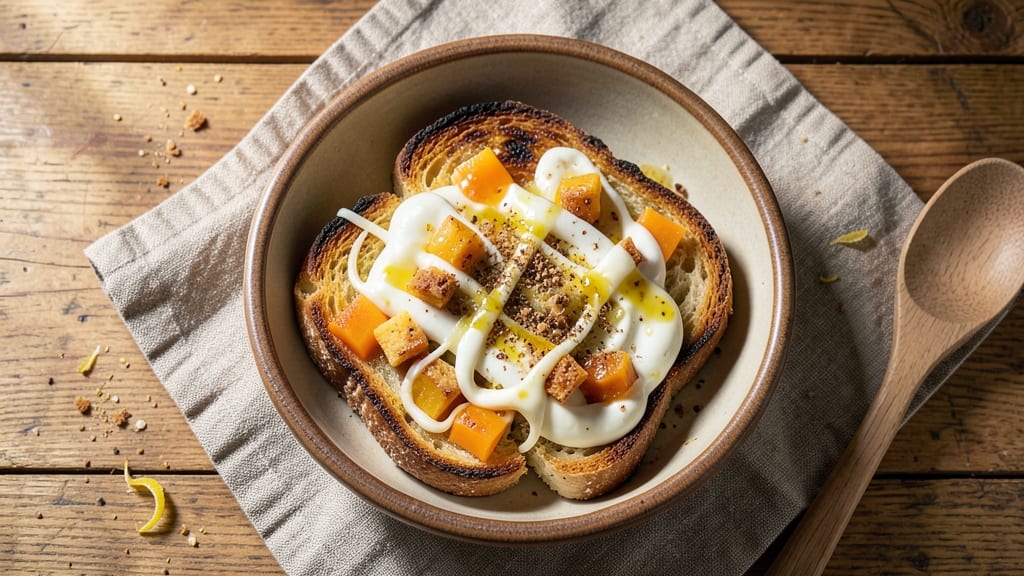
This artisan grilled cheese recipe transforms a simple lunch into a crispy-crusted masterpiece that rivals any deli. The secret lies in high-quality bread, carefully selected cheeses, and precise pan technique that creates that coveted golden-brown crust.
I've perfected this method over years of testing, and it delivers results that are impossible to resist.
What sets this recipe apart is the triple-cheese blend—aged cheddar for sharp flavor, Gruyère for nutty depth, and mozzarella for meltability—that creates a pull-apart texture with each bite.
The bread gets properly toasted in butter until it's crispy around the edges but still soft inside, while the cheese melts into a creamy, stretchy center. Every element comes together in perfect harmony.
This isn't your childhood grilled cheese—it's a restaurant-quality sandwich with restaurant-quality results. The technique ensures crispy edges that hold up to the gooey cheese inside, and the cheese selection creates layers of flavor that keep you reaching for another bite.
When paired with a warm bowl of tomato soup, it becomes a complete meal that feels indulgent yet balanced.
Whether you're making it for a quick lunch or a special occasion, this recipe delivers consistent results every time. The method is approachable yet professional, making it perfect for home cooks who want to elevate their sandwich game without complicated techniques. Let's get started on creating your perfect grilled cheese.
Ingredients for artisan grilled cheese
High-quality bread, three dreamy cheeses, and butter that sings—this is your crispy-crusted grilled cheese upgrade.
| Ingredient | Amount | Notes |
|---|---|---|
| Sourdough Bread 🍞 | 8 slices | Thick-cut, crusty loaf preferred |
| Unsalted Butter 🧈 | ½ cup | Cold, cut into 8 equal pieces |
| Aged Cheddar Cheese 🧀 | ¾ cup | Sharp, crumbled for texture |
| Gruyère Cheese 🧀 | ½ cup | Freshly grated, nutty flavor |
| Mozzarella Cheese 🧀 | ½ cup | Fresh, sliced into 8 pieces |
| Mayonnaise 🥫 | 2 tbsp | For extra richness (optional) |
| Diamond Crystal Kosher Salt 🧂 | ½ tsp | For finishing crispy edges |
| Black Pepper 🌶️ | ¼ tsp | Freshly cracked for heat |
| Extra-Virgin Olive Oil 🫒 | 1 tbsp | For brushing bread (optional) |
| Garlic Powder 🧄 | ½ tsp | For extra flavor depth |
| Fresh Thyme Leaves 🌿 | 2 tsp | Chopped, for garnish (optional) |
The bread is everything—sourdough with a thick crust holds up to the cheese without getting soggy. Breadsack or Whole Foods sourdough are my go-tos, but any sturdy loaf works. Skip the pre-sliced stuff; tear your own pieces for better texture. The cheeses? Gouda or pepper jack can swap in if you're not into Gruyère, but trust me on the triple-cheese combo for that perfect pull-apart magic. And that butter? Cold and cubed—never melted—is non-negotiable for crispy edges.
No Gruyère? Parmesan mixed with sharp cheddar mimics that nutty depth. Fresh mozzarella is ideal, but low-moisture shredded works in a pinch—just pat it dry first. Want extra richness? Slather the bread with mayo before buttering (I always do). The garlic powder and thyme are optional but take this from good to chef's kiss—sprinkle them on the cheese layer for a herbaceous kick. And if you're feeling fancy, brush the outside of the bread with olive oil before toasting for extra crispiness.
Cold butter stays cold longer in the fridge, so take it out 10 minutes before cooking. Cheese keeps best in airtight containers—wrap those wedges tightly. Store any leftovers in parchment paper to prevent sogginess. This reheats beautifully—30 seconds in a dry pan revives the crispy edges perfectly. And if you're making a batch for the week? Freeze extras—they thaw in minutes and taste just as good.
Why You'll Love This Recipe
- I swear by this combo: the tangy bite of sourdough, the nutty depth of Gruyère, and that aged cheddar melt—it’s like a flavor party in every bite. No fancy prep, just layer those cheeses with butter and let the pan do the work.
- Five-Ingredient Magic: I swear by this combo: the tangy bite of sourdough, the nutty depth of Gruyère, and that aged cheddar melt—it’s like a flavor party in every bite. No fancy prep, just layer those cheeses with butter and let the pan do the work.
- Weeknight Hero: Between us, this is my go-to when I’m too tired to think. Toast the sourdough just until golden, add the cheese, and press—done. Even my picky teen doesn’t complain (and that’s saying something).
- Leftovers That Don’t Suck: Unlike sad, rubbery grilled cheese from yesterday, this stays crispy outside and gooey inside for days. I’ll slice it up for lunch or cube it into a pasta bake—no waste, all win.
Step-by-step instructions for crispy-crusted triple-cheese grilled cheese
Transform simple bread and cheese into a golden, pull-apart masterpiece with these foolproof techniques.
Prepare the Cheese Filling with Maximum Flavor
In a medium bowl, combine the 0.75 cup aged cheddar cheese, 0.5 cup gruyère cheese, and 0.5 cup mozzarella cheese. I like to use my fingers to break up the cheddar into small, uneven pieces for texture while keeping the gruyère and mozzarella in larger chunks. Add the 2 tbsp mayonnaise, 0.5 tsp garlic powder, 0.25 tsp black pepper, and 2 tsp chopped fresh thyme leaves, then mix gently until just combined.
The mayonnaise adds luxurious richness that prevents the cheese from becoming too dry, while the garlic powder and thyme elevate this beyond basic grilled cheese. Keep this mixture at room temperature while you prep the bread—cold cheese won't melt as smoothly.
Assemble the Sandwiches with Precision
Lay out 4 slices of the sourdough bread on your work surface. On each slice, spread 1 tbsp of the extra-virgin olive oil using the back of a spoon—this creates a crispy barrier between the bread and cheese. Then divide the cheese mixture evenly, placing about 2 tablespoons on each slice. Top with the remaining 4 slices of sourdough bread, pressing gently to adhere.
Here's the thing—don't overpress or the cheese will squeeze out during cooking. I like to make two sandwiches at a time for even cooking, keeping the others covered until ready. The olive oil is optional but creates that perfect crackly crust that makes this an artisan experience.
Cook Low and Slow for Perfect Melting
Heat a large skillet over medium-low heat—this is crucial for even melting without burning. Add a cold piece of the unsalted butter to each sandwich (about 1 tablespoon per sandwich) and let it melt completely, about 2-3 minutes per side. The butter should foam gently but not brown.
Watch for the edges to develop a deep golden brown color while the cheese melts into a gooey center. You'll know it's ready when the bread releases easily from the pan and the cheese has just begun to pull away from the edges. Don't rush this step—patience ensures that perfect melt without dry cheese.
Press for Pull-Apart Perfection (The Magic Touch)
Transfer one sandwich to a plate and place another heavy skillet (or a cast-iron lid) on top. Press down gently for 30 seconds—this creates that signature pull-apart texture while keeping the interior creamy. Repeat with the remaining sandwiches, stacking them as you go.
Real talk: This pressing step is what transforms ordinary grilled cheese into something restaurant-worthy. The weight creates resistance that makes each bite satisfyingly chewy. Let them rest for 1 minute before serving to let the cheese set slightly—this prevents meltdown when cutting.
Finish with Crispy Edges and Garnish
Return the pressed sandwiches to the skillet over medium heat for 30-45 seconds to crisp the bottoms. Sprinkle each sandwich with 0.125 tsp of the diamond crystal kosher salt (about 1/8 tsp per sandwich) and cut diagonally into 4 pieces for serving.
Serve immediately with the extra 1 tbsp extra-virgin olive oil drizzled over the top for that final artisan touch. The contrast of crispy exterior, gooey center, and savory thyme-pepper cheese makes every bite irresistible. And if anyone asks, the secret is in the pressing—don't skip it!
Pro Tips For Making Artisan Grilled Cheese
- CRANK THE HEAT HIGH: Start your pan screaming hot—sourdough needs that initial shock to brown properly. I learned this the hard way after making three limp, sad sandwiches with lukewarm butter. Once the butter foams, turn it down to medium-low and let the cheese melt without fighting the pan.
- GRATE THE CHEESE FINE: Skip the block chunks—they’ll just sit there like stubborn guests at a party. Aged cheddar and Gruyère need to be grated as fine as possible (a box grater works) so they melt into a creamy, cohesive layer. Mozzarella can stay slightly chunkier, but don’t go overboard—you want goo, not a cheese salad.
- BUTTER THE OUTSIDE ONLY: Slather the outside of the bread with unsalted butter—inside gets cheese, outside gets that golden crust. I used to butter both sides, and while it tastes fine, the outside never gets that perfect caramelized bite. (Yes, even if you’re impatient like me.)
- PRESS HARD, DON’T STIR: Once the cheese starts bubbling, press down with a spatula for 10 seconds—this forces the melty goodness to bind the sandwich. Resist the urge to poke or flip; you’re not making pancakes. The sandwich will hold together, and the cheese won’t ooze out like a failed science experiment.
Make-ahead tips for this dish
Prep Ahead Strategy
Assemble your sandwiches up to 4 hours ahead and store them in the fridge, separated by parchment paper. The cheese stays cold but still melts beautifully when cooked. I like to wrap each sandwich individually in plastic wrap to prevent sticking—this keeps them intact for easy reheating later. 🌟
Freezer-Friendly Method
For longer storage, freeze uncooked sandwiches on a tray first to prevent sticking, then transfer to ziplock bags with all air removed. They'll keep for 3 months—just thaw at room temperature for 15-20 minutes before cooking.
The bread stays crispy even after freezing, which is a game-changer for busy days.
Batch Cooking Tips
Make a double batch and store half for later—I often prep 8 sandwiches at once using my 12-inch cast iron skillet. Cook them all at the same time, then freeze extras individually.
When reheating, cook from frozen in the skillet over medium heat for 3-4 minutes per side—no thawing needed!
Reheating Perfection
Revive leftovers by toasting in a dry skillet over medium heat for 2-3 minutes per side until the edges are golden again. Add a fresh 1 tbsp butter to restore that crispy crust.
I avoid microwaving—it turns the bread soggy and the cheese rubbery. For extra flavor, brush the outside with olive oil before reheating.
Make-Ahead Add-Ins
Prep components separately for customization: caramelize 1 cup onions and store them in the fridge, or make 2 tbsp truffle oil ahead to drizzle on finished sandwiches. I also like to toast ½ cup breadcrumbs with garlic powder for a crispy topping—just sprinkle on before pressing.
These add-ins keep for 5 days in airtight containers.
Portion Control
Cut sandwiches into 4 triangles before freezing or storing—they reheat faster and are perfect single-serving portions. Wrap each piece individually in parchment paper to prevent sticking. This also makes them ideal for lunches or quick snacks when you're in a hurry. 💪
Nutrition facts
Frequently asked questions
What's the secret to getting that perfect crispy crust?
Cold butter is your best friend! Use cold, cubed butter (never melted) and cook over medium-low heat for even browning. The key is patience—let the butter foam gently without browning, about 2-3 minutes per side. A cast-iron skillet helps create that restaurant-quality crust.
Can I use any type of cheese in this recipe?
While the triple-cheese blend (aged cheddar, Gruyère, and mozzarella) works best, you can swap in other melty cheeses like Gouda or pepper jack. For extra richness, add a touch of cream cheese to the mix. Just avoid pre-shredded cheeses—they contain anti-caking agents that prevent proper melting.
Why does my grilled cheese turn out soggy?
Sogginess usually means the bread absorbed too much moisture. To fix this, press the sandwiches gently but firmly with a heavy skillet for 30 seconds after initial cooking. Also, make sure your bread is sturdy (like sourdough) and not too fresh—day-old bread works better. And always cook over medium-low heat to prevent steam buildup.
How do I make this recipe gluten-free?
Swap the sourdough for a high-quality gluten-free bread like Canyon Bakehouse or Schar artisan loaves. Use the same cheese blend but reduce the mayo slightly—gluten-free bread can be drier. Cook over medium heat (not low) to ensure proper browning, as gluten-free bread needs more direct heat. A drizzle of olive oil before cooking helps create crispiness.
What's the best way to reheat leftovers?
Never microwave! Instead, toast leftovers in a dry skillet over medium heat for 2-3 minutes per side until golden. Add a fresh 1 tbsp butter to restore that crispy crust. For extra flavor, brush the outside with olive oil before reheating. This method keeps the cheese creamy and the bread crispy—just like fresh!